In DIY Temporary Tattoo Art, vlogger and fashionista K. L. CAO uses a variety of easy-to-find materials like tissue paper, pressed flowers, gold leaf, henna ink, and more to give you what you need to amp up your style. Her thirty-five simple temporary tattoo projects include flash (metallic/shimmering), black-light reactive, watercolor style, freckle temporary tattoos, henna tattoos, and many more!
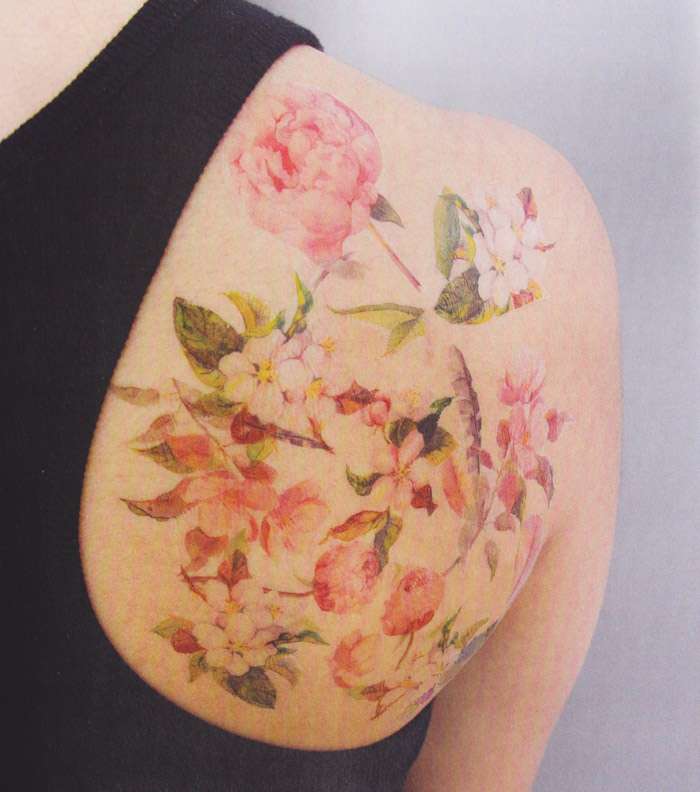
Today we’re sharing her Wallflower Temporary Tattoo project which is super easy and a perfect DIY for the beach, a music festival or just for fun! Check it out below!
DIY Wallflower Temporary Tattoo
An excerpt from “DIY Temporary Tattoo Art, Easy Step-by-step Instructions for Watercolor, Henna, Flash Tattoos and More!” by K. L. CAO.
Materials
—Scissors
—Wallflowers template (click here to download) copied onto 8.5″ x 11″ temporary tattoo paper
—1 – 2 make-up wedges

1. Use scissors to carefully cut out each flower, working as precisely as you can.

2. Take one of the cut-out flowers and remove the clear film from the tattoo paper. Place the paper sticky side down on any flat surface of the body where you will have enough room to place all the flowers in your design. (I chose the top back of the shoulder as my starting point.) Press gently to make sure the tattoo adheres to the skin. Repeat to create your first layer of flowers.
3. Soak a makeup wedge in water and shake off excess. Gently dab the backing of the tattoos with the wedge until the paper is saturated.

4. Gently peel the backing away from the tattoos to reveal the images.
5. Repeat application as many times as needed in order to fill in any gaps. In between each application make sure the skin is dry before adding on another layer of tattoos. Once all the tattoos are dry, head out the door and get ready to stand out.
Click HERE to download the wallflower pdf file.

DIY Temporary Tattoo Art, Easy Step-by-step Instructions for Watercolor, Henna, Flash Tattoos and More!” by K. L. CAO is available through Simon and Schusterand available at most bookstores.


