


Today we’re excited to share with you a really fun project we came across on Instagram by Kezz of Kezzabeth blog out of the UK. Kezz and her partner Grant have been very busy fixing up their second home, one room at a time and documenting it all on her blog. We loved this patterned floor they made for their conservatory renovation. The result is an attractive patterned floor that looks like tiles! Kerry shares the how-to below. Thank you Kerry!
~Jan
Patterned tiles are a huge trend at the moment – but if you’re up for a bit of challenge, you can save yourself some cash by creating your own patterned floor, just with a bit of paint!
Which Paint?
A good hard-wearing floor paint is required for this project. The one I’m using is Rustoleum’s Chalky Finish Floor Paint. This can be used on both concrete and wooden floors – and the colours I’ve picked out are Anthracite and Winter Grey.

Things You Will Need
• Pencil and Sharpener
• Tape Measure
• Long Ruler (I’m using a spirit level)
• Smaller Ruler
• Floor Paint in 2 Colours
• Large Paint Brush
• Very Small Tipped Paint Brush


Step 1 – Clean, Clean, Clean!
For a good durable finish on the floor, you really need to make sure the area is completely clean and free of debris. You don’t want any little gravelly bits in the floor that might dislodge later and scuff-up the paint when walked over. So for this reason, it’s super important the floor is completely clean and clear. I scrubbed the floor first and then went over with a powerful vacuum to make sure it was as clean as possible.
Step 2 – Base Coat
After the floor has completely dried, painting can then begin! To make life easier when it comes to doing the pattern, it’s a good idea to paint the whole floor in one colour first. Painting a floor does use a lot more paint than you’d think, but one coat of the paint I’m using gave a really really good coverage. I used a large paint brush to apply the paint and made sure to really work it into the floor, not applying too much. You could probably use a roller as well, but it may not get into all the crevices, if you have any. So having a paint brush on hand is definitely ideal!

Step 3 – Picking a Pattern
I recommend googling pattered floors for inspiration and drawing up some mock-ideas first. I wanted something geometric, but easy to draw. A pattern that’s too complicated, will be harder to mark out on the floor and could end in one big fail. Something that’s easy to repeat will also make life much easier – there’s plenty of inspiration out there to be found!
Step 4 – Marking the Pattern Out
To make the floor look as “tile-like” as possible, I decided to grid up the floor into 33x33cm squares as this is a pretty standard size for most square tiles. I marked it out using just a tape measure, long spirit level (to be used a ruler) and a pencil. This room is pretty square so I was able to use the walls as starting point, with the lines running parallel against both walls.


After the room had been gridded up into squares, I then went over with diagonal lines across those squares, alternating them in a zig-zag across each row. So it ended up looking like this…

Step 5 – Painting the Pattern
Once it’s all been drawn out, you can then begin going on with the second colour. Due to the contours and crevices in this concrete floor, masking tape wasn’t suitable to use – so instead I decided to freehand it. I used some super small tipped paint brushes to get right into the corners of the triangle pattern and a slightly larger one to colour the rest of it. You need a steady hand for this and to take your time. But if you enjoy painting – this really isn’t too much of a chore. Free handing the pattern also helps it to look a bit like hand-finished tiles. Imperfect but perfect.


If you’re struggling to keep a steady hand, I recommend doing short spans of painting over a few days. You may also need to go back over with a second coat on the lighter colour as well – but don’t worry too much if you smudge any lines, as you can always touch up at the end! This may not be the quickest painting project, but the finish is so worth it!

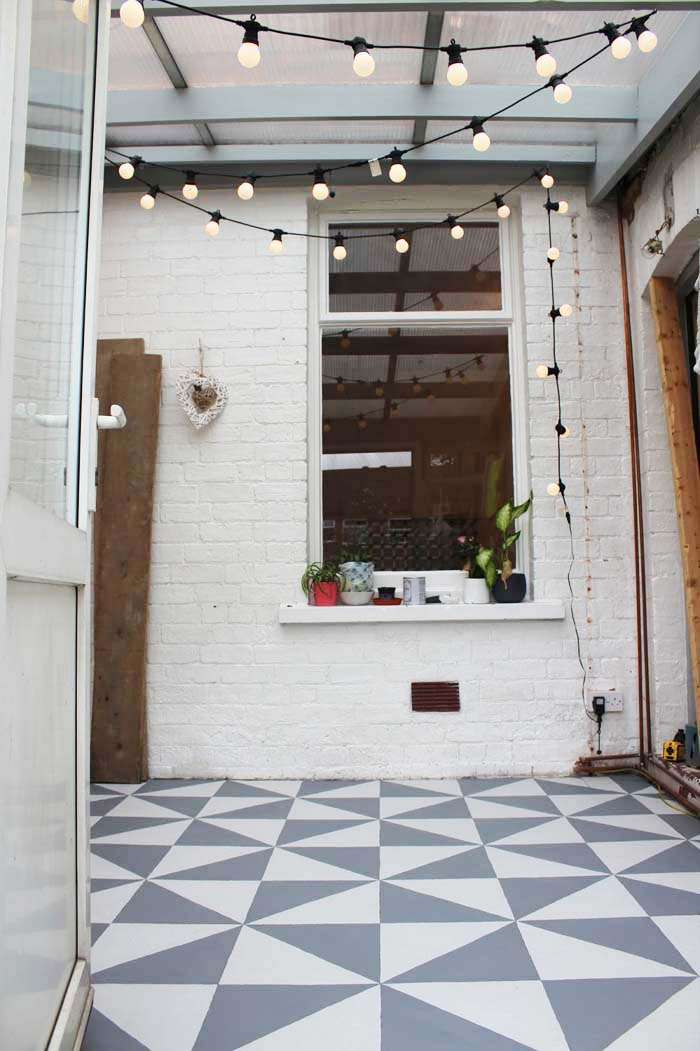
And just like that – the floor is now beautifully patterned and almost tilelooking. It’s quirky, fun and could suit any space that needs a touch of character!
If you want to see more pics, the flooring that used to be in here, as well as our plans for the rest of this room – head over to my blog to read more 🙂
About Kezzabeth:
Hi, I’m Kezz! A DIY and Renovation blogger from UK, sharing our journey of turning a house into a home. With small budgets and big plans, we’re mastering the DIY-life and saving cash as we go!
Blog – http://www.kezzabeth.co.uk
Twitter – @kezzabeth
Pinterest – @kezzabeth
Instagram – @kezzabeth_blog

