


We’re excited today to share a DIY project from Christine Schmidt of Yellow Owl Workshop‘s newest book, Make It Yours, Patterns and inspiration to stamp, stencil and customize your stuff. Once again, Christine makes all our DIY dreams come true with a stunning collection of projects that are inspiring and fresh. From creating the most adorable stamped clay ornaments to turning an old dresser into an eye-catching art deco showpiece, Christine shows readers how to create gorgeous projects using unexpected materials. To launch the book which is on sale today we’re sharing the art deco dresser project which is one of our favourites from the book. Check it out below!
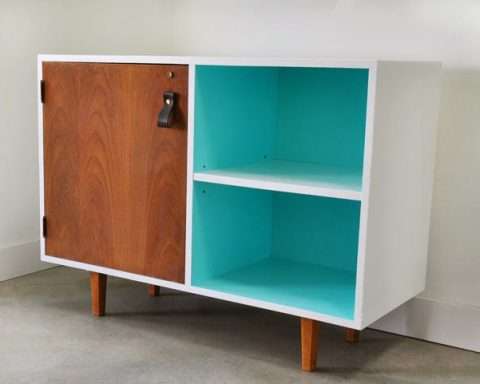
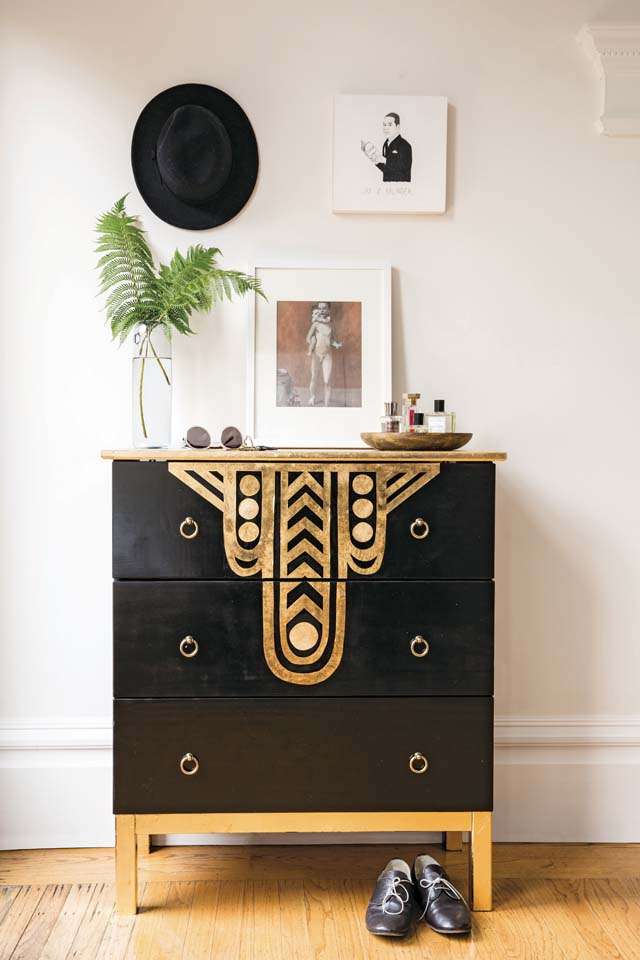
Art Deco Dresser
During art school I paid bills by working as a mural painter and faux finisher. It was the late 1990s and faux marbling and sponge painting could not be stopped. I especially loved metal leafing with gold, copper, and silver. Using a simple Ikea dresser, this project showcases both the traditional method of leafing and a new method I developed to get crisp leaf motifs every time.
Art Deco, an art and design movement that started in France after the Second World War, played with geometric shapes, symmetry, and gold, baby, gold. The motif can be scaled or multiplied to fit any dresser, wall, or even a jewelry box. Gold and metal leaf works on many surfaces, even glass and melamine. Always remember to seal your surface before you begin so the adhesive sizing takes—and to seal it after to protect your work. I like to use large foam brushes to apply sealer and adhesive because these products will ruin your expensive brushes, and the larger brush size facilitates the application process.
MATERIALS
Damp cloth
Dresser
Rag
2 foam brushes, each 2″ (5cm)
Gold leaf kit with 25 sheets of leaf, adhesive sizing, brush, and sealer
Additional gold leaf sheets
Templates A, B, and C (click here and here to download)
Clear contact paper
Craft knife
Cutting mat, cardboard, or chipboard, 20″ × 18″ (51cm × 45.5 cm) or larger
Masking tape
Tracing paper, 81⁄2″ × 11″ (21.5cm × 28cm)
Fine point permanent marker
Scissors (optional)
Flat brush, 1⁄2″ (13mm)
Mod Podge, Gloss Finish, 16 oz (473mL)
TIME: 4 hours
LEARN: How to apply gold leafing to surfaces using two techniques
REMIX: Use these techniques to decorate any wood, glass, or paper item; create a large canvas stamp with this motif
Instructions, Part 1 (Traditional Method)
We will use this method to cover the entire dresser top. It is best to do this project indoors, where nothing will fall or blow onto the surface as you work.
1. Wipe the dresser clean with a damp rag. Any dust will prevent the adhesive from working properly.
2. Use a foam brush to apply the adhesive sizing in a thin, even coat to the top surface of the dresser. Allow it to dry for at least 20 minutes, up to one hour, or until sizing is clear and tacky. This time will vary depending on your climate. If you start too soon, the gold leaf will tear and move with the wet sizing.
3. Wash and dry your hands immediately before applying leaf because oil, sweat, or residue will make the leaf stick to your hands rather than your work surface. Open to a fresh sheet of gold leaf in the booklet. Place gold leaf facedown on the adhesive surface. Press gently and remove booklet, leaving only the gold leaf. Smooth with a small bristle brush.

4. Repeat step 3 until surface is covered in gold leaf.
5. Place small bits of leaf over any gaps and smooth them with the bristle brush. Use a gentle stippling motion to get into any grooves and then a wiping motion to slough off the extra leaf.
6. Use the second foam brush to apply at least two coats of protective sealer, allowing time to dry between coats.
Instructions, Part 2 (Cheater’s Method)
We will use this method to create the stenciled decoration on the face of the dresser.
1. Remove adhesive backing from a sheet of contact paper and lay it faceup on a table. Press gold leaf sheets onto contact paper. Once you have covered the surface with gold leaf, paint on at least two layers of sealer with a foam brush and set to dry overnight.
2. Place gold-leafed contact paper, plastic side up, on a cutting mat about 20″ × 18″ (51cm × 45.5cm).
3. Trace templates A, B, and C on tracing paper (template C is a mirror image of template B—see pages 148–49) and attach the three templates with tape onto the gold-leafed contact paper. Using a craft knife, cut out the three shapes. You may want to use scissors to cut out the circles.
4. Lay the dresser on the ground with the drawers facing up. Position the gold-leaf decoupage motif in the center of the top drawer with contact paper side down. Align the straight edge of the motif with the top edge of the top drawer. Apply small pieces of tape to secure the main large motif and the circles in position.
5. Lift up portions of the gold-leaf decoupage motif and coat the back with Mod Podge, removing tape as needed. Lay motif back down and smooth with your hands. Wipe up excess Mod Podge with a rag.
6. Using a craft knife, cut a centered line between the top and middle drawers. Fold over edges and adhere with Mod Podge.
7. Brush Mod Podge on decorated surfaces to seal the leafing.

Make It Yours, Patterns and inspiration to stamp, stencil and customize your stuff (Clarkson Potter; on sale March 28, 2017; $22). Click here to find out more.
Follow Christine Schmidt + Yellow Owl Workshop:
Site/Shop – yellowowlworkshop.com
Instagram – @yellowowlworkshop