


This post is in partnership with Scotch™ Brand and Post-it® Brand. Scotch™ Brand and Post-it ® Brand products work the first time, every time.
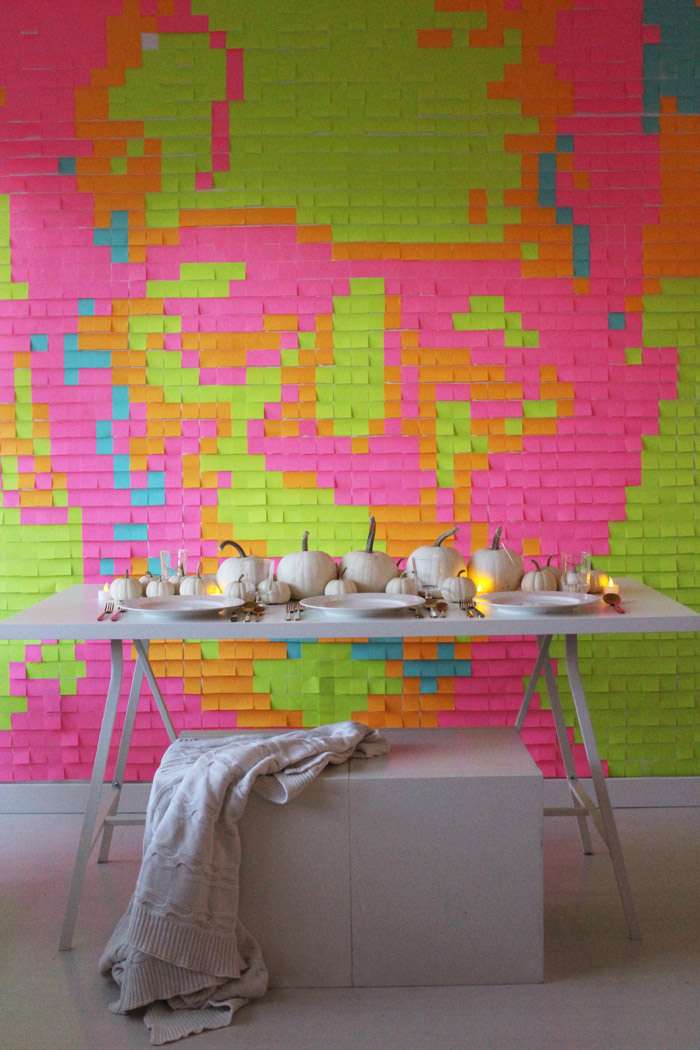
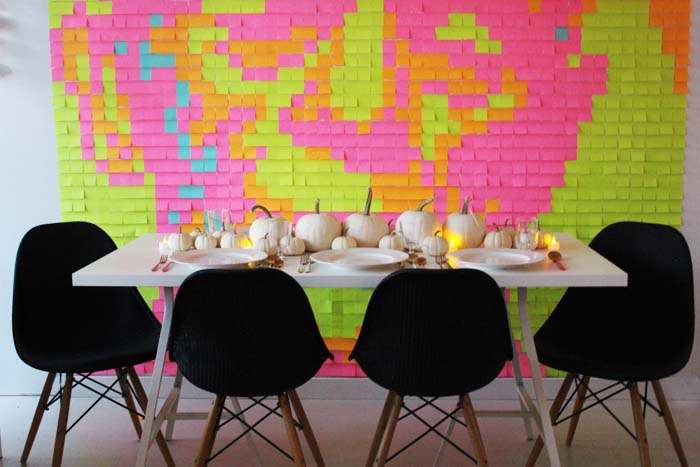
Having always been wanting to create one of those Post-it ® Brand Note murals, and with Halloween just around the corner, when the folks at Post-it® Brand asked us to work together, why not create a pixel-style mural using their Post-it® Notes for a party idea!?
We love that this project can also be translated into any event or even to decorate a kid’s, teen or dorm room. With that in mind, for this project we will be showing you how to turn any image you like into pixel art using Photoshop and then taking it from digital form to real-life mural. Check out our how-to below.
DIY Post-it® Note Mural
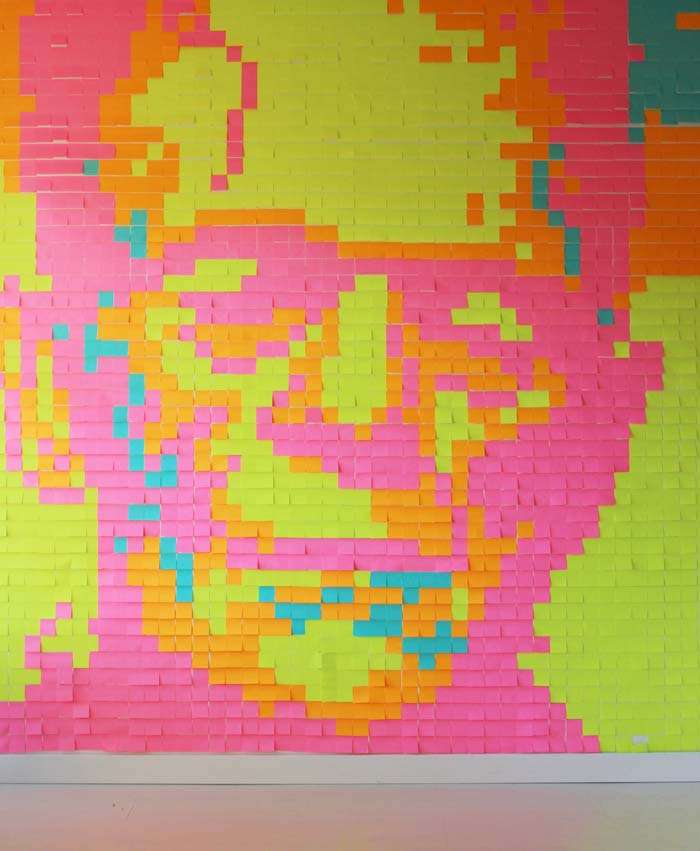
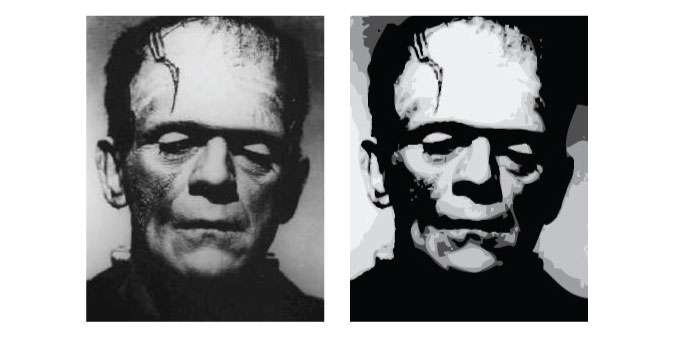
To start choose an image. You can choose any image you wish as long as it is in digital form. For this project, as it is Halloween-themed, we chose Frankenstein, and turned a black and white into a colourful mural using the Miami collection from Post-it® Brand. If you wish to use our Frankenstein image (already pixelated), see below for the printable link. But if you are using your own image, below is how we created ours.
You will need
A digital image (or download our Frankenstein pixelated template HERE)
8 – 10 packs (8 pads in each) of Post-it ® Notes (We used the 47.6 mm or 1-7/8 Miami collection from Post-it® Brand)
Computer with photoshop (You can download a free version online)
Printer
Paper
Pen
Ruler (optional)
a clean wall (free of grease)
a level (to ensure straight lines when working on the wall)
Step 1
Create contrast with your image. Open the Hue/Saturation menu and select Image / Adjustments / Hue/Saturation and increase the saturation to 25 or higher until you see a contrast.
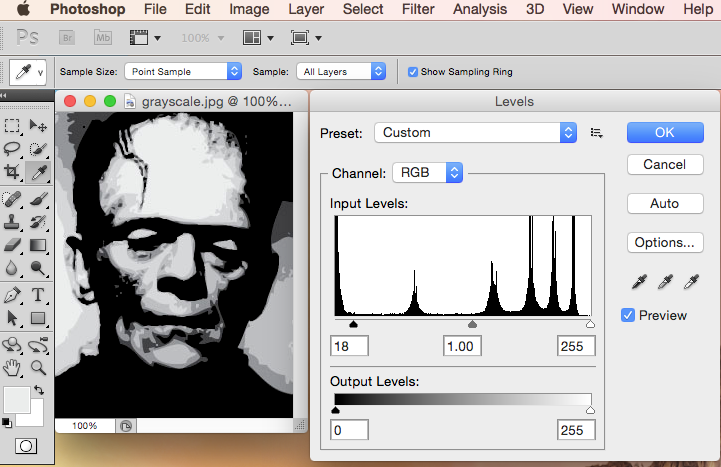
Step 2
Increase the contrast even more. To do this select Image / Adjustments / Levels. Adjust the levels by sliding the black-and-white input-level tabs until you see more contrast in the photo (notice the shading).
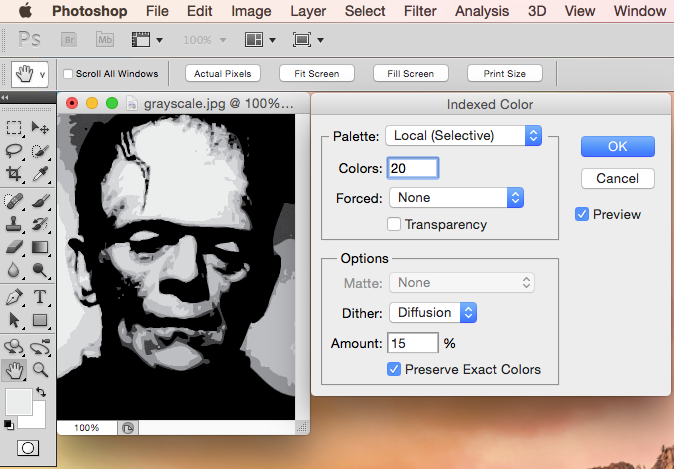
Step 3
Next, you need to reduce the colours in the image. Select Image / Mode / Indexed Color, and select Local (Selective), Colors 20, Forced None, DitherDiffusion, Amount 15%. As shown below.
Step 4
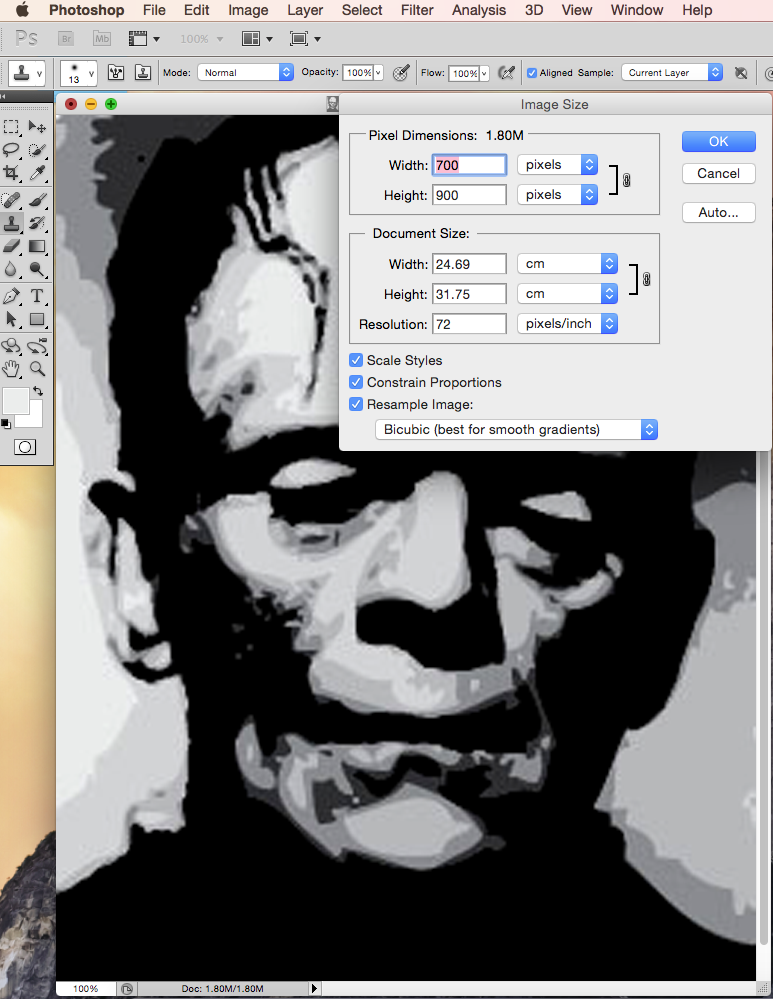
In order to get a large pixelation you need to create a larger image from a smaller image. So if your image is large, you will need to make it small first. To do this, Select Image / Image Size. and enter 75 pixels. Click OK. Then you will need to enlarge the photo. Enlarge photo to at least to 700 – 1000 pixels. Select Image / Image Size. Enter 700 pixels. Click OK.
Step 5
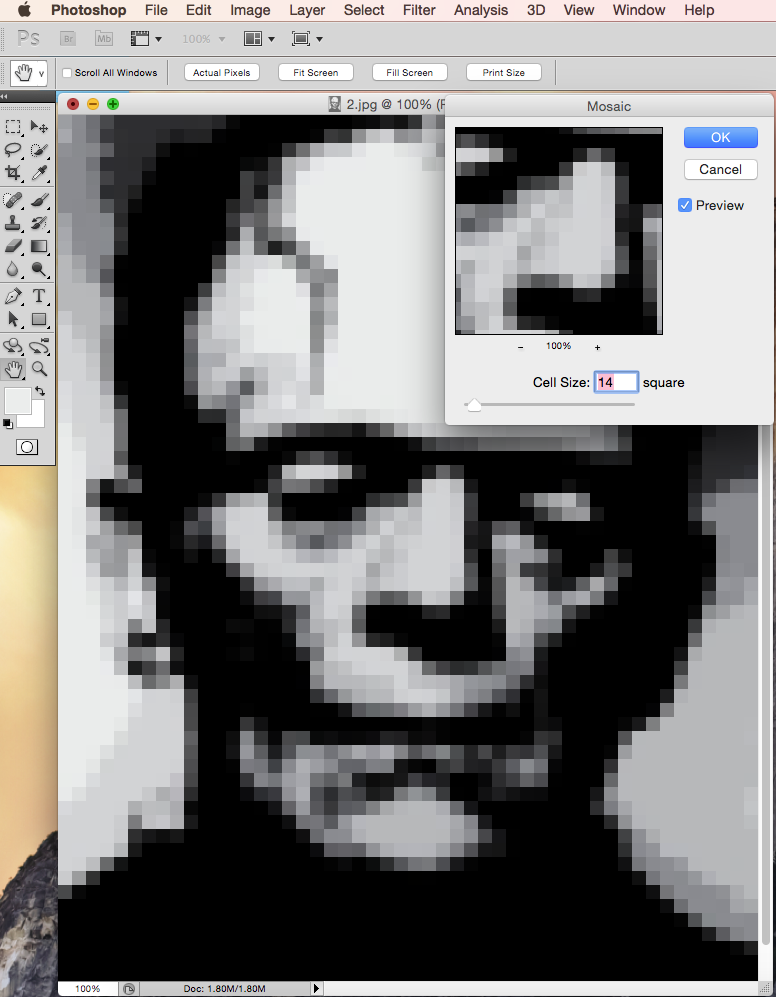
Next, select Filter / Pixelate / Mosaic, slide the Cell Size to 14 square. Click OK. Save as a .jpg or as a PDF file. Select File / Save for Web for a .jpg, or select File / Save and select PDF. You can print out at this point if you like. Or go to the optional Step 6.
Step 6 (Optional)
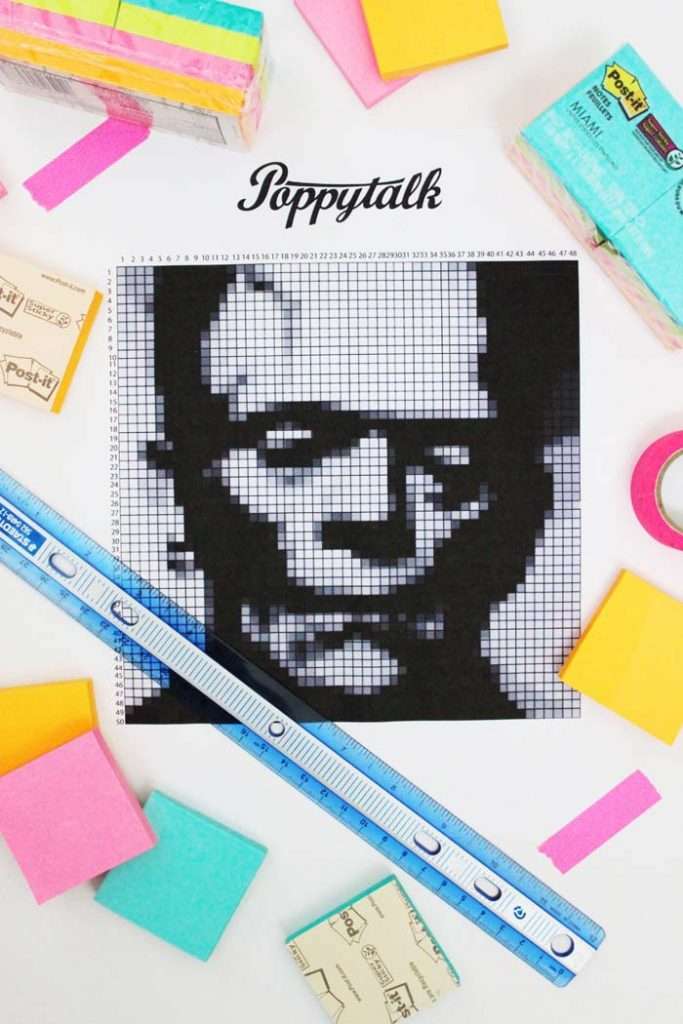
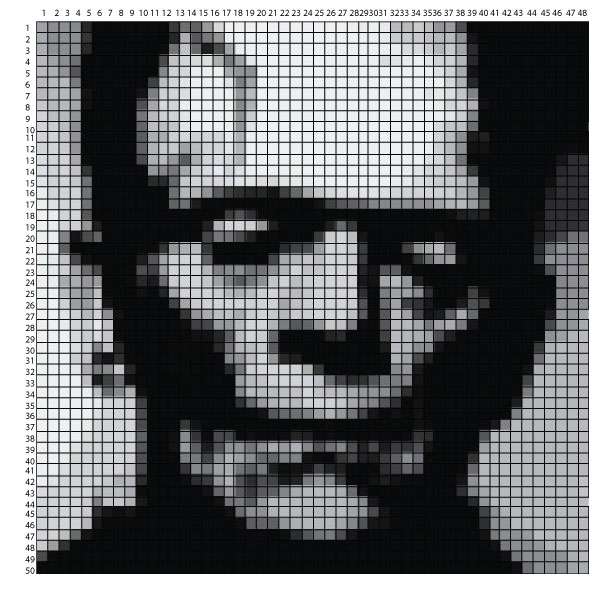
To make things a little easier when counting each pixel, we pulled the image into Illustrator and created some lines to emphasize each pixel more, as well as numbered them. You could also do this by hand using a ruler and pen and then number them. We then saved this file as a printable pdf file.
If you would like to use our file, click HERE for the printable template.
To create the mural
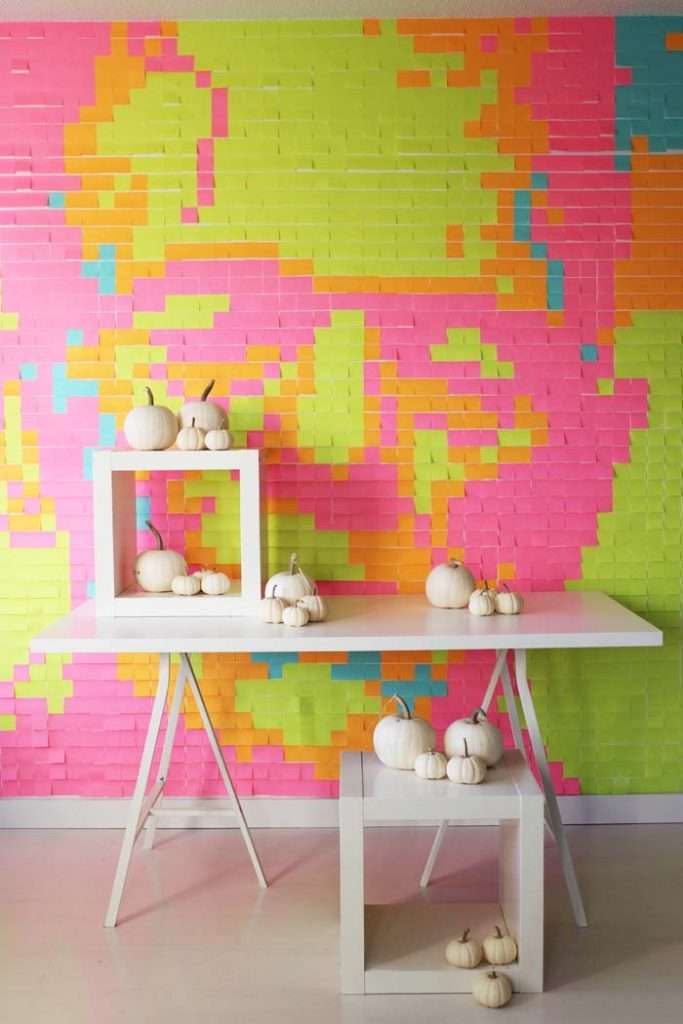
To begin, you’ll need to colour code your template. Using the Miami collection from Post-it® Brand, the following is how we colour coded it:
Light grey – green
Dark grey – orange
Black – pink
Charcoal/Brownish – blue
Next, take a level to mark a straight line at where you will begin creating it. For this mural, we needed quite a large space. Since it is almost 50 pixels wide by 50 pixels high. When using the 1-7/8 Post-it® Notes equals approximately 9 feet wide x 9 feet high. And since a standard wall height is 8 feet high, we didn’t use the last few lines (height-wise). To work out how many Post-it® Notes you will need, simply multiply your grid (for example, ours is 50 x 48) which means we will need approximately 2,400 Post-it® Notes. And then each 1-7/8 pack (of 8) has 720 notes. You will also need to take into consideration how many colours for each, so although 2,400 notes is what we need, we needed to use more packages (approximately 25 pads in total which equals 4 packages – but then doubled to 8 packages to get all the colours needed).
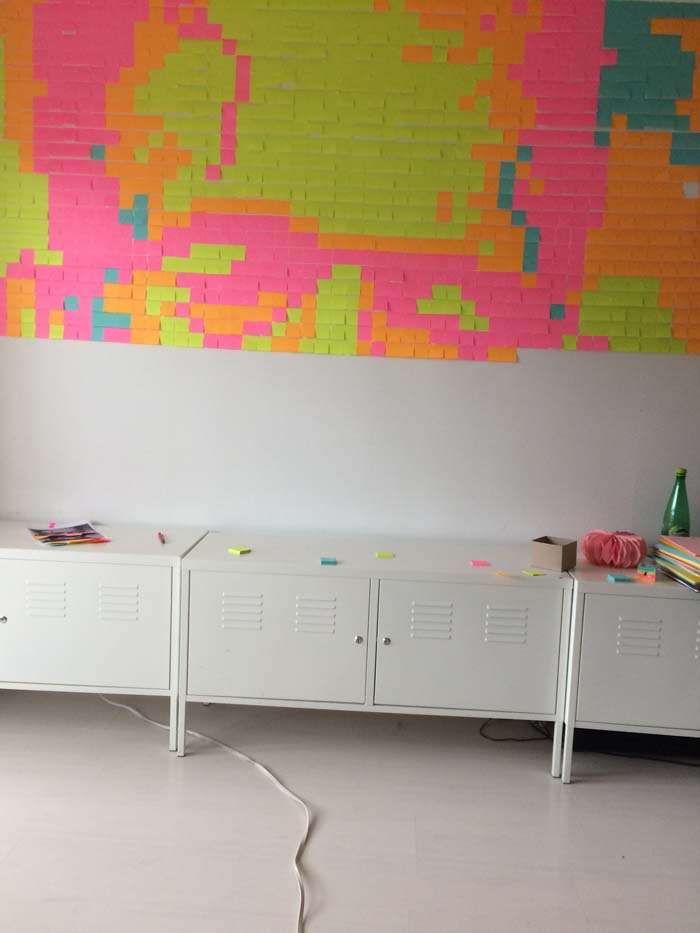
Once you have marked your straight line, begin to create your mural. Working from the left and following the colour coded template, begin to place your Post-it®Notes. We found it easiest to work line by line, but as we worked in places that had a large amount of the same colour, we were able to work in blocks. See our time-lapse video below to see what we mean.
This project was rather easy to create once we got going, and as mentioned before, would be a fun project to decorate a kids, teen or dorm room using any image you would like. The result is budget-friendly piece of art that will make any room pop!
For more great ideas and inspiration from these brands, check out inspirationthatsticks.3m.com Happy Halloween!