


These Sweet and Salty Peanut Butter cookies I posted yesterday deserve to be gifted, they are that good.
This treat box project is the perfect compliment to these sweet and savoury cookies. Semi-sweet chocolate is melted in a mixture of butter and vanilla flour and eggs and then topped with a salty, peanut butter cream cheese frosting. For the full recipe, visit the addjoy.ca website and while you’re there, be sure to enter their Add Joy $50 grocery card contest where they are giving away $40k in cards!
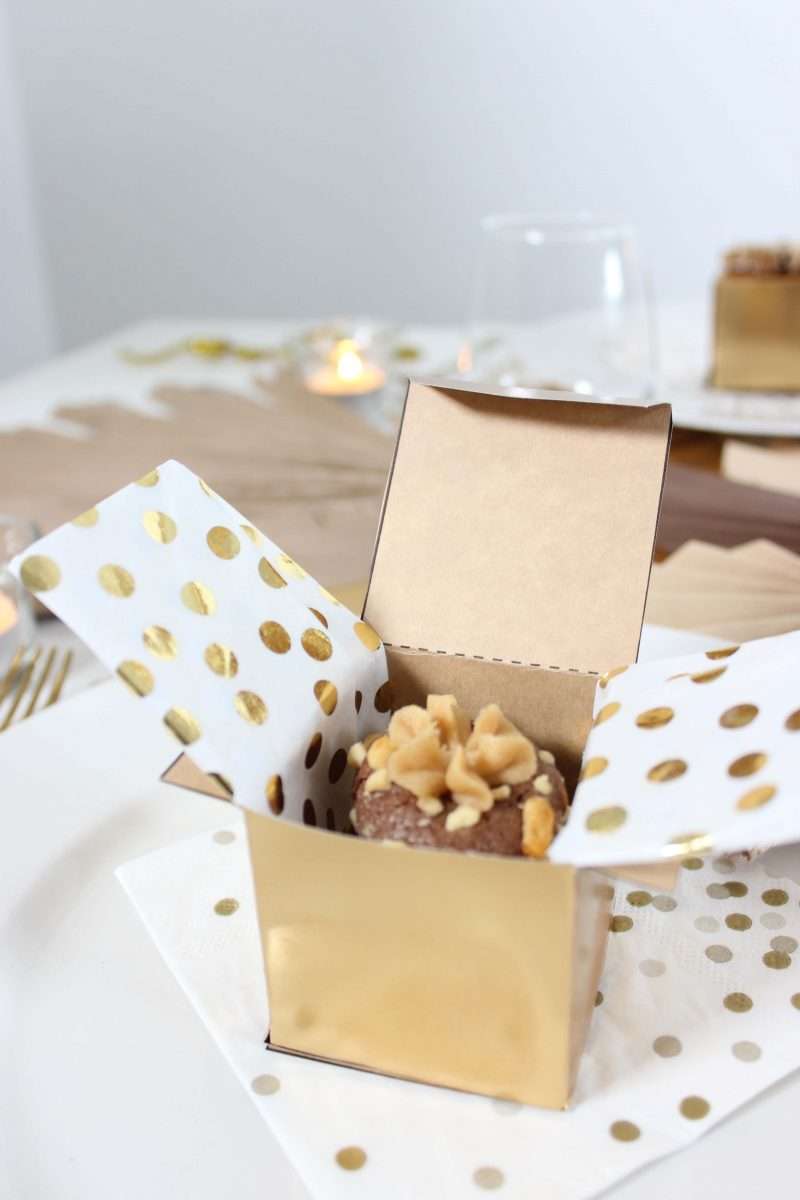
Wrap them in these adorable printable boxes to gift to guests this holiday season. Check out the how-to and printable below.

DIY Printable Cookie Treat Box

You will need:
- Cardstock 8.5 x 11 paper (I used gold)
- Printable Box Template
- Printer
- Scissors
- Glue Gun
How to make:
Step 1
Download and print off the printable box template. Print off as many as you’ll need. Click here for the file.


Step 2
Cut on the solid line outline(s), and the outside of all the flaps.
Step 3
Fold all of the dotted lines, and then starting at the opposite end.


Step 4
Starting from the bottom end, fold in the first flap underneath the next.
Step 5
Working each flap into the other until you form a box.


Step 6
Fold into a box shape.
Step 7
Fold flaps on top to secure until you glue into place.


Step 8
Secure the bottom using a glue gun or tape.
Step 9
Then secure the side with glue and hold until dry.

Step 10
Then measure and cut out some tissue paper to line the box.


Step 11
Fold the tissue to fit inside the box.
Step 12
Fill the box with a couple of the cookies.

Step 12
Then top with your favourite bow or something like this coffee filter palm fan leaf I made (see instructions below).
Coffee Filter Palm Leaf (Bows)

You will need:
-Pour-over style coffee filters in different sizes. I used Size 2 for these smaller leaves, however for the demo I used larger ones for visuals.
-Glue gun or tape
– Scissors


Step 1
Place 2 of the same sized filters together. At a 45 degree angle, start to fold (accordian-style) working your way across from one end to the other.
Step 2
Separate the filters. Then place the same sized end of one filter, against the other and glue together using a glue gun. You could also tape, however keep in mind it might not look as finished as a glued one.


Step 3
Then gather the bottom end of the two glued pieces to create a fan-like form. Using an extra filter, cut a strip off one end. Then glue it to cover the end, wrapping it around like a stem. Secure at the end of the strip with more glue (or tape).
Step 4
Attach the bow to the top of the box using a bit glue.
Stay tuned for more tablescape and recipes coming soon!
Pssst! There’s also a contest! WIN $50 to buy all your brunching ingredients, go to addjoy.ca for more details.
Good luck!