


Every year around this time, I look forward to creating something special for the holidays to share here on the blog with our readers. I love the idea of a faux tree that one can print out to add a little holiday decor to an unsuspecting place, using regular printer paper you would already have handy hanging around at home or at the office.
Inspired by all the pampas grass I have been seeing so much of this fall, I created a faux tree using printable images of the grass, and paired them with printable fluffy white feather branches. The tree we created is 4 feet high, however you could make it as large or as small as you would like just by adding more or less feathers. See below for the how-to.
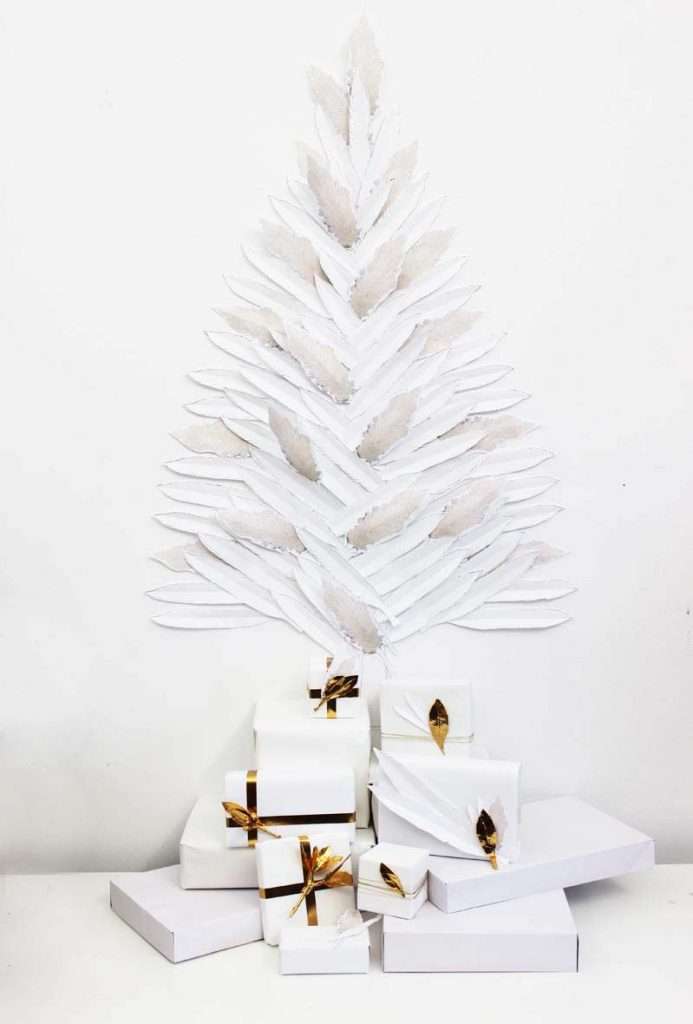
Feather Tree
This makes a 4 ft high tree from top to bottom of trunk.
You will need
Computer and printer
White (20 lb.) 8.5 x 11 paper
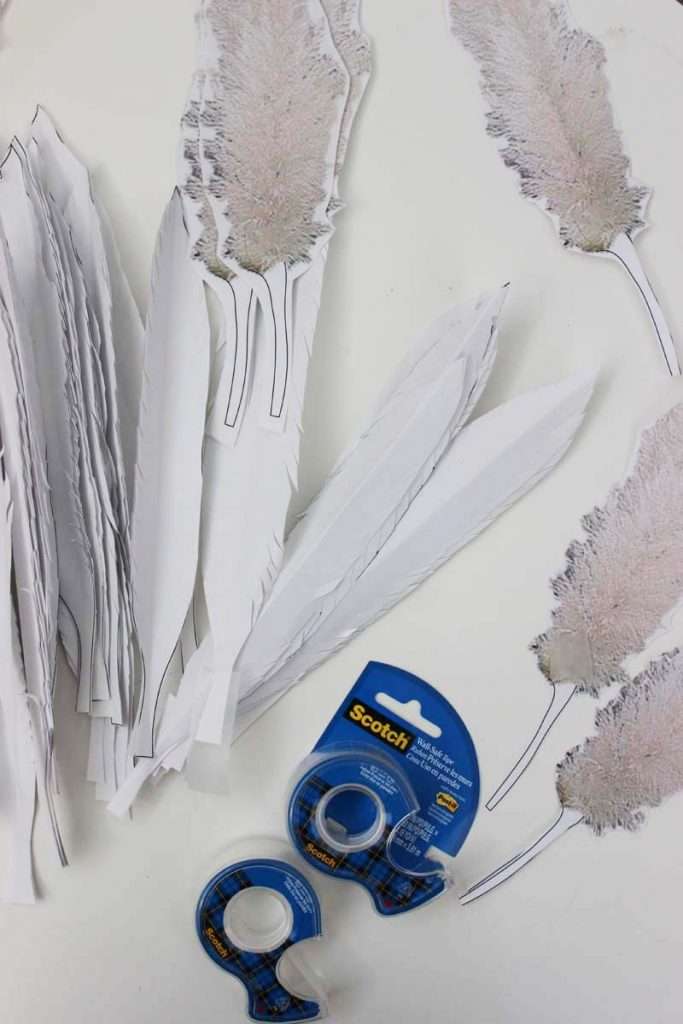
Scotch® Wall-Safe Tape
Scissors
Black fine tip pen
Print out: Feather PDF (approximately 17 pages – or as you go)
Print out: Pampas Grass PDF (approximately 10 pages – or as you go)
Print out: Tree Trunk (one page)
Instructions
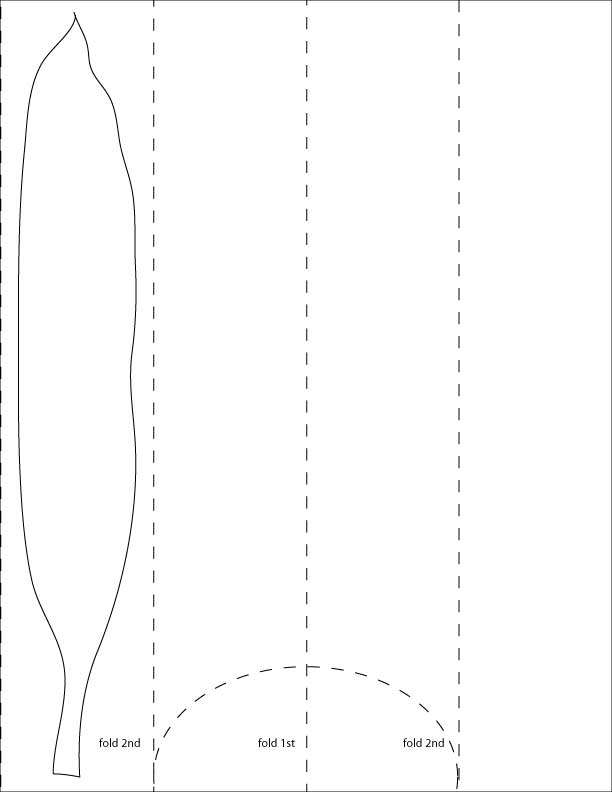
Download the feather pdf file (see above for link). You will need to print out approximately 17 to 18 pages to create a 4 ft high tree. Of course you can make a smaller or larger tree, just increase/decrease the number of feathers. With the printout in the portrait direction, fold the paper in half (as seen in Diagram 1 directly below). Then fold again. Then cut following the edge of the feather. Each page will make 4 feathers
After the feathers are cut, fold the four feathers (from each print out) that you have just cut, and fold the feather in half. Then cut along the edges (top to bottom) to create a feathered effect. You’ll notice that the top feather will have the black edges. If you would like to have black edges on all the others for reach print out (like we created), you will need to run a black fine tip pen along the edges. (Note: we only added a bit of edges here and there, to make it look more hand illustrated, and to lessen the work involved). Repeat with all feather pages. Next, print out the pampas grass sheets, and cut out each image. Set aside.

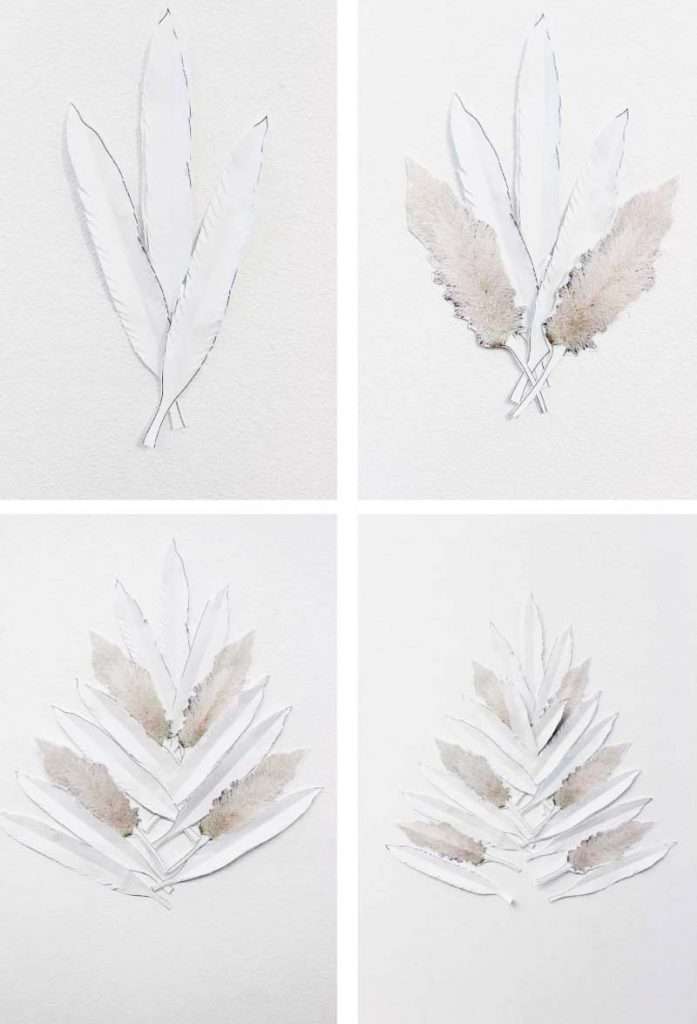
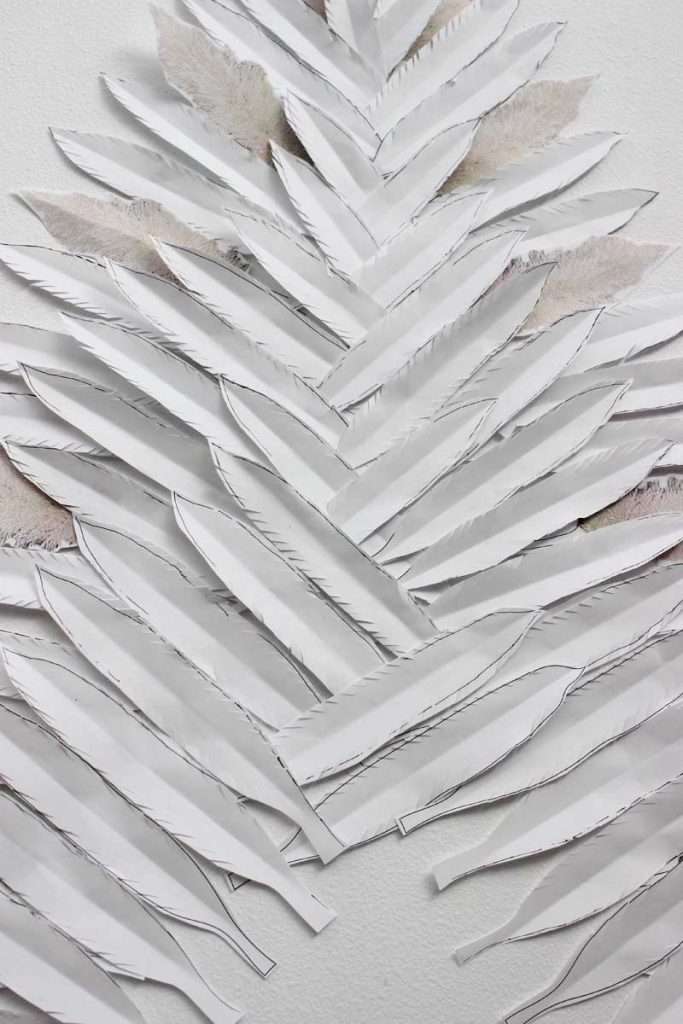
To attach the feathers to the wall, we used Scotch® Wall-Safe Tape, which sticks securely, and removes cleanly, so that you don’t have to worry about damaging your walls. To start, first measure 4 feet up from where you want the tree to be placed. Then once you have it measured, start by taping feathers one by one as shown in the images below. We found it easiest to place each feather balancing symmetrically from side to side, and then when you start to get wider, just do the outsides first, and then the centre, criss-crossing as you go to create the illusion of branches. Place the cut out pampas grass images in between the feathered branches, as you see fit. We started off with a couple at the top, then, every two feathers and then mid-way, every three feathers, down the side. And then once you have all the feathers place, you can fill in more pampas grass as you see fit. Simply print out more feathers and pampas grass as you need.
At the very end, add the trunk. Just print it out and cut, taping it securely to the wall. Congrats! You have created a beautiful pampas grass and feather tree!
Psssst! To create the gold leaf washi tape leaves and gift wrap accessories seen beneath the tree, check out our next post, or click here! Happy Holidays!